How To Setup Shortcuts & Saved Replies
Shortcuts are an easy way for you to customize and set up canned responses. You can insert a shortcut triggered by keystrokes or by clicking on the shortcuts tab in the chat box, rather than typing the same answer repeatedly or pasting from some other resource. There are several pre-installed shortcuts already created for you. You can customize these or create your own shortcuts.
Shortcuts always begin with the / character, making it easy for you to use a canned response.
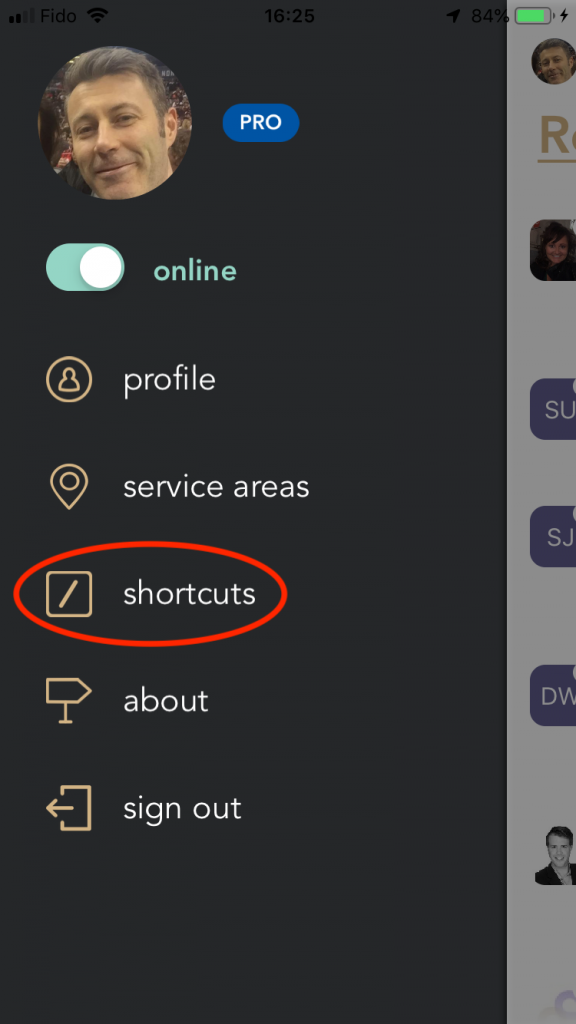
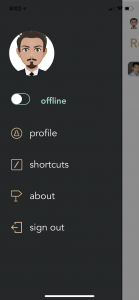
To set up shortcuts, open the app and access the menu by tapping on your photo in the top left corner then tap on shortcuts.
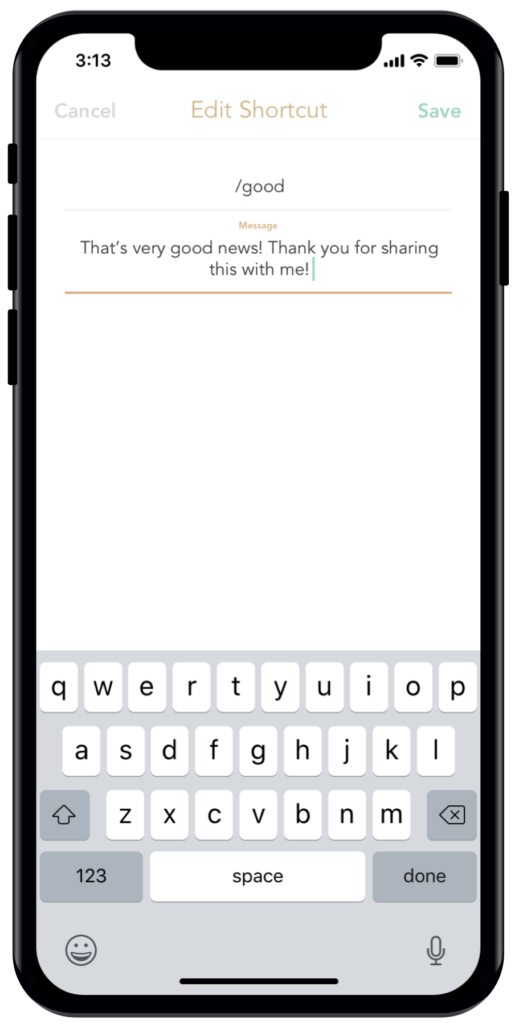
To customize a pre-installed shortcut, just tap on the one you want to edit, make your changes and be sure to click Save once you’re done.
To create a new shortcut, tap on New in the top right corner. Name your shortcut, customize the messaging and click Save.
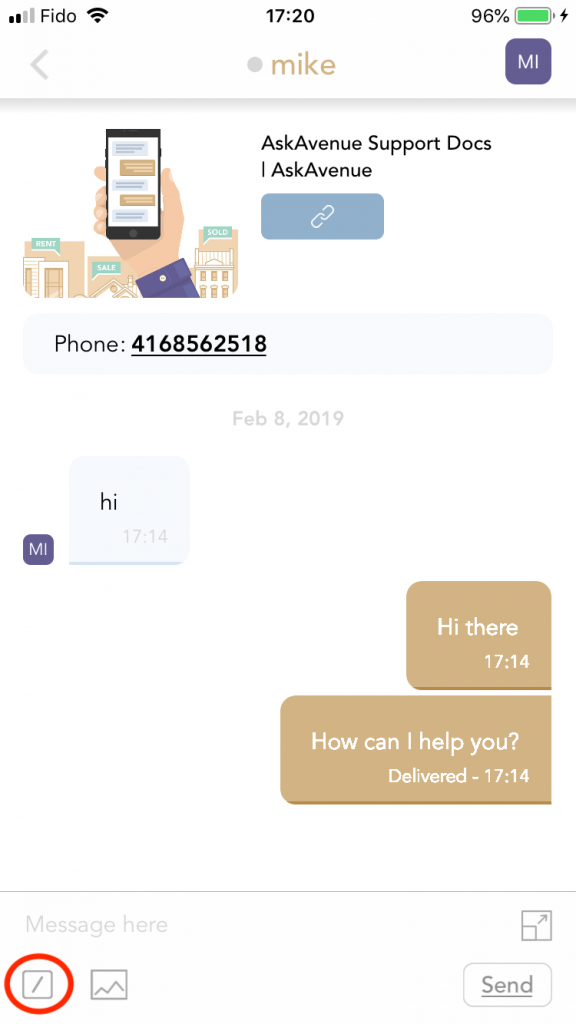
To use shortcuts while in a conversation, click on the shortcuts icon in the bottom left corner. Select the message you would like to use and it will appear in the dialogue box. Just click send and your message will be sent!
To setup shortcuts, open the app and access the menu by tapping on your photo in the top left corner then tap on shortcuts.
To create a new shortcut click on New and enter a keyword for your shortcut, followed by the message. Then click Save.
To use shortcuts while in a conversation, click on the shortcuts icon in the bottom left corner. Select the message you would like to use and it will appear in the dialogue box. Just click send and your message will be sent!
Click below to watch a video on how to setup and use shortcuts.
Importing Agents To Your Account
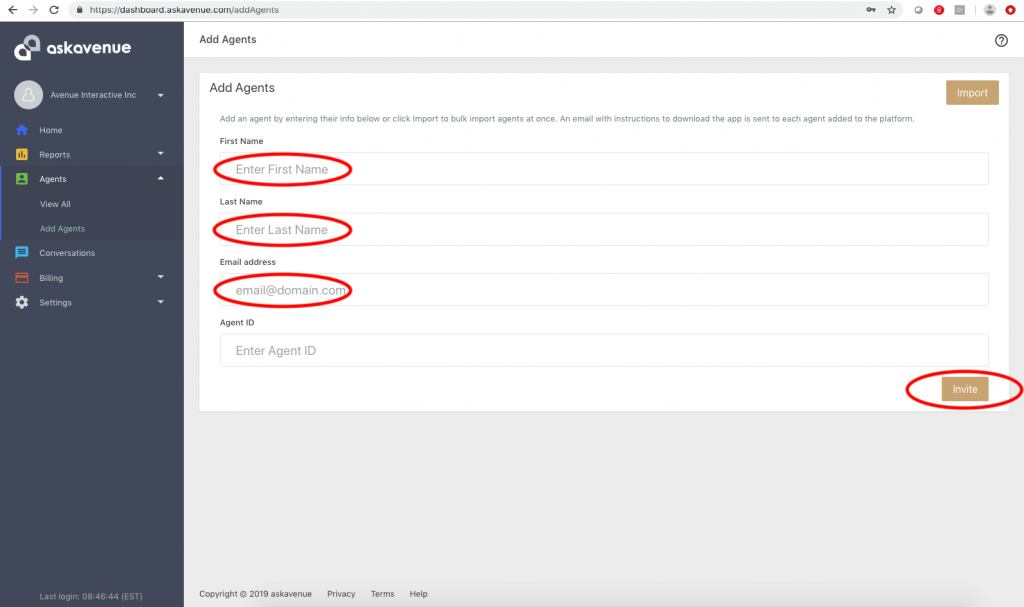
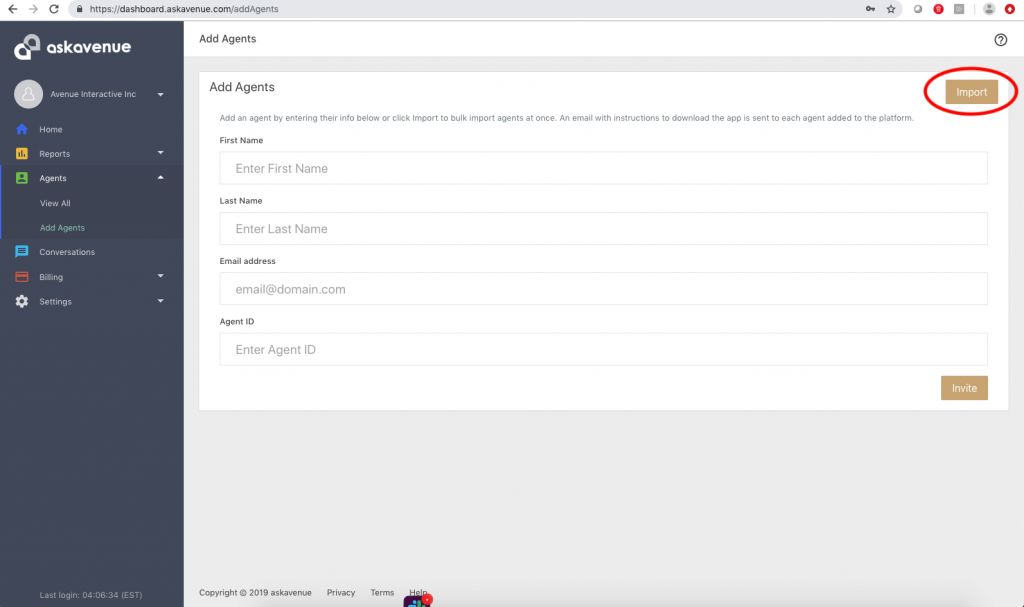
Askavenue allows you to easily add agents to your account so they can begin receiving chat leads. To do this, just login to your Dashboard then click on Agents > Add Agents.
Just enter the first name, last name and email address of the agent and then click the Invite button located in the bottom-right corner. The agent will immediately receive an Email Invite. All they need to do is accept the invite, create their own passwords and follow the simple set-up instructions!
You can also bulk import all your users rather than adding them one by one. To begin, follow these steps:
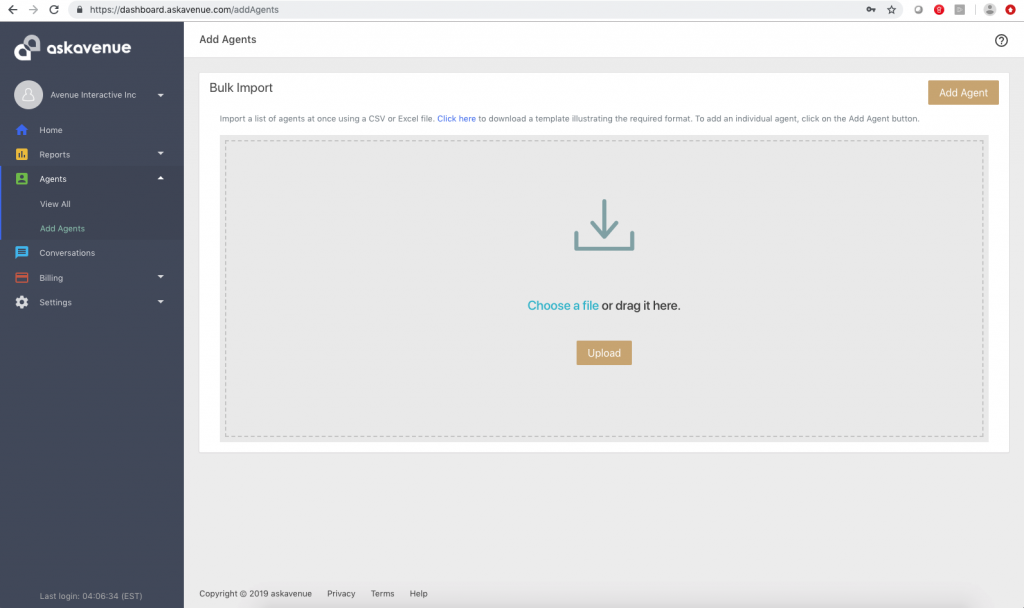
Login to your Dashboard and select Agents > Add Agents. On the top right, click Import.
Download the template file to view the accepted file format and structure.
Update the template file with your User’s information and then Upload or drag and drop the file into the upload space for the import to start.
Imported users will receive an Email Invite similar to the one received when adding individual agents one by one. All users are still required to setup their own passwords after accepting the invitation.
Click below to watch a video on how to add agents to your account.
How Are Chats Routed?
The parameters passed in your widget code determine how chats are routed.
The askavenue platform identifies agents by Agent ID. An Agent ID can be added/imported by the Account Owner or one is automatically assigned to them by our system.
When a chat is initiated, our system will look for a value in options.agent_id to identify an agent in our system. If a match is found, the agent’s profile picture is then loaded into the chat widget rather than the Default Avatar uploaded. This also confirms to the user that the chat request is going to that agent. If an Agent ID is not passed in options.agent_id then our system falls back on a multi-agent broadcast, defined by a set of rules that can be customizable by the account owner.
Here are some common scenarios:
1. If Agent ID is passed, then the chat is sent directly to that agent.
2. If Agent ID is not passed, the chat is then broadcast to multiple agents based on the rules defined here.
3. If Agent ID is passed but invalid, then the chat widget will not load. An invalid ID is defined as a value that was not matched to any agent in our system. This approach can also be used to suppress the widget on pages where you may want it hidden.
Note, Agent IDs are unique per account so there must be a match for both options.agent_id and options.brokerage_uuid to successfully send a chat.
Understanding Online/Offline Status
Changing your status to online/offline will determine whether or not you are available to take chats and receive push notifications from the askavenue app.
By default, your status will be set to online, which means your chat widget will be displayed on your website and listing pages.

Setting your status to offline will hide your chat widget on your website and listing pages, so that your website visitors will not be able to chat with you.
NOTE: that once you change your status to offline, you will need to change it back to online in order to reactive the chat widget on your website/listing pages.
To change your status to offline, open up the askavenue app and tap on the circular icon in the top left-hand corner to access the Settings folder. From the Setting folder, you can then change your status from online to offline.
Introducing The NEW AskAvenue Chat Widget
Conversations.
They’re the most powerful sales and marketing tool you have, right?
It’s not about website form submissions or leads — it’s about having conversations with buyers and sellers in your market who you can help.
And that’s why we took a conversation-first approach with the new AskAvenue chat widget.
But the conversation-first approach isn’t just some thought experiment. During our beta testing of the new chat widget, we saw a 25% increase in engagement rates from users, while consumer response rates also increased by 35%!
So today, we’re rolling out the new conversation-first widget with a new design and customization features available to you from within your web dashboard.
This is a free update for all askavenue customers, so you are not required to take action in order to enable the new chat widget.
Here’s what’s included in the update:
- NEW automatic lead capture sequence – lead contact info is now collected in a more natural, conversational way (see it in action). Please note that name is no longer a required field to be entered prior to chatting, however email is still a requirement so you can follow-up offline.
Convert More Chat Leads
Need help starting a conversation with a lead?
Well you’ve come to the right place.
We get it, reaching out to someone you’ve never met before can be intimidating. You don’t want to spook them, or worse, annoy them.
Here are three tips for starting a new conversation with a new chat lead.
How To Start A Conversation With A New Lead
Say Hi
I know. This one sounds obvious, right? But people rarely do it.
You have to remember that a lead isn’t just an email address, or a contact from a database, they’re a real person just like you. So be polite and say “Hi!”
What would you say to someone who just walked into your office for the first time? You’d say “Hello”. Communicating with a chat lead is no different and your good manners will set a positive tone for the rest of the conversation.
Be Human
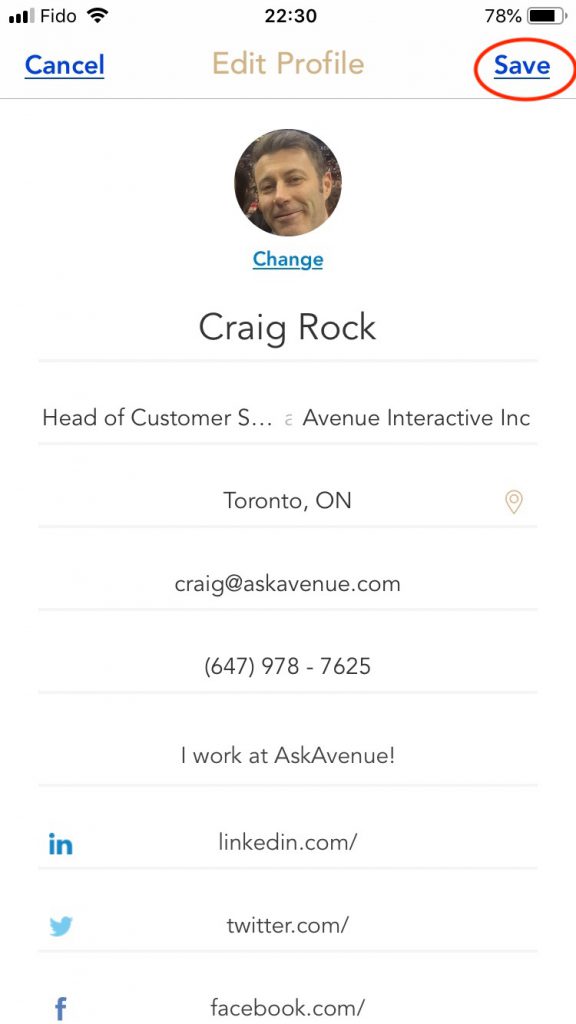
There’s no better way to start a conversation than by showing you’re a real person too. Don’t try to be too formal – feel free to use emoji’s to express yourself 🤪. Once you’ve started a conversation, answer their questions as best you can, and then try and get them talking about their buying or selling needs. If you’re using AskAvenue PRO, we make this even easier for you. Every time you get a new message, we give you as much information as we can about the person you’re chatting with. For people who’ve provided their email address (this is where it gets awesome) you’ll get enriched data for that contact, including their name, location, job and company information, links to their social profiles and more, like this:
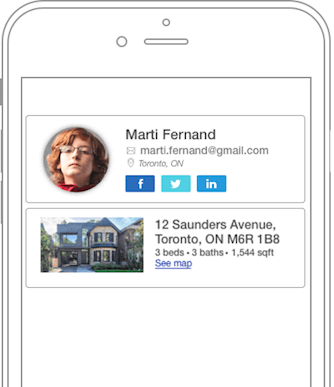
You can use any of this information to have a better conversation with your new leads, like “I see you’re located in Toronto, are you planning on relocating to Vancouver anytime soon?”
Take Control
Answering questions from interested buyers or sellers is great, but if you don’t take control of the chat conversation, you’ll end up only providing information and receiving nothing in return. This is why it is important to control the flow of a chat conversation by providing short answers to questions and then asking prospecting questions yourself, so you can more effectively help a chat lead move closer to their desired goal – buying or selling a home with you.
To help you in better manage chat conversations and win more business, be sure to ask useful questions so you can better understand what the chat lead is looking for and how you can help them. For example, if a chat lead lead is requesting more info on a particular property, it is likely that they want similar listings to the property in question, so it appropriate and valuable to probe a little further by asking “are you interested in similar listings in the area?” or “what is your budget, I can recommend similar listings within your price range”. All of this will get the chat lead to open up and provide you with more information as to how you can assist them, rather than you having to answer 21 questions.
At the end of the day, the best thing you can do is be a real person. Say hello and try and help them find the best home if they’re buying, or provide market insights if they’re planning on listing. Regardless if they’re buying or selling, try to tailor the conversation to their needs.
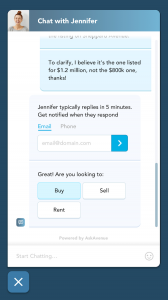
To tie all of these together, here’s an example chat script of how one of our successful customers use AskAvenue to qualify buyer leads (this customer has a ~60% conversion rate):
Greeting: Hi [visitor name]!


Build rapport: I’m happy to answer that for you…

Answer: Monthly maintenance fees in this building are approx.. [insert response]

Qualifying question #1: Is this for investment purposes?

Qualifying question #2: Would you like me to setup a showing for you?

Conversion Statement: I have your email address, but what’s a good phone number where I can reach you with further questions?
How Do I Upload/Update My Profile Picture?
Studies have shown that websites with human faces tend to convert a higher number of website traffic into leads. This is why it’s so important to personalize the chat experience by uploading a profile picture of yourself (not your dog) for optimum results.
Follow these steps to upload/update a profile picture in the askavenue app.
- Open the askavenue app
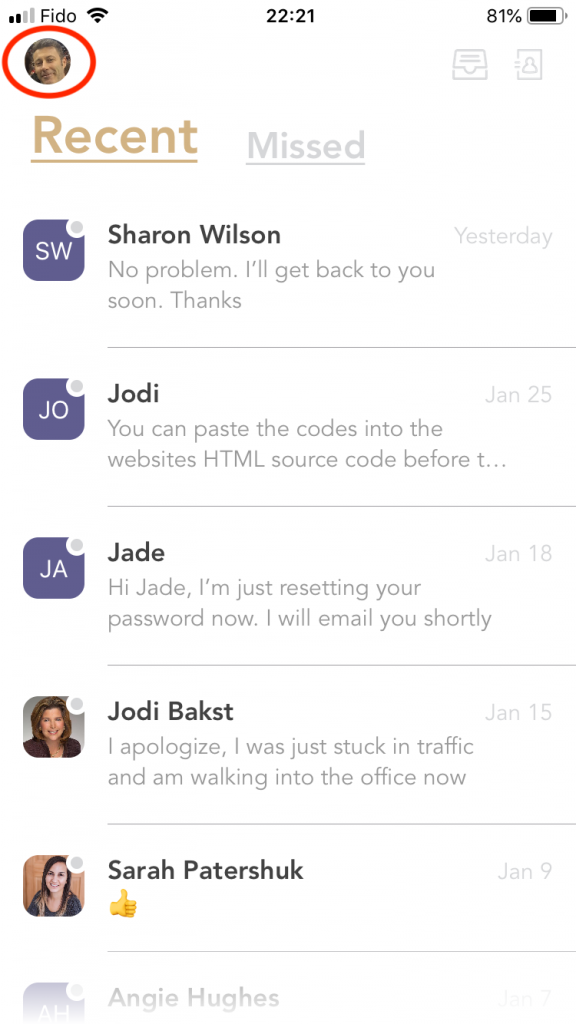
- Tap the circular icon in the top-left corner (this will be blank if you have never uploaded a photo before)
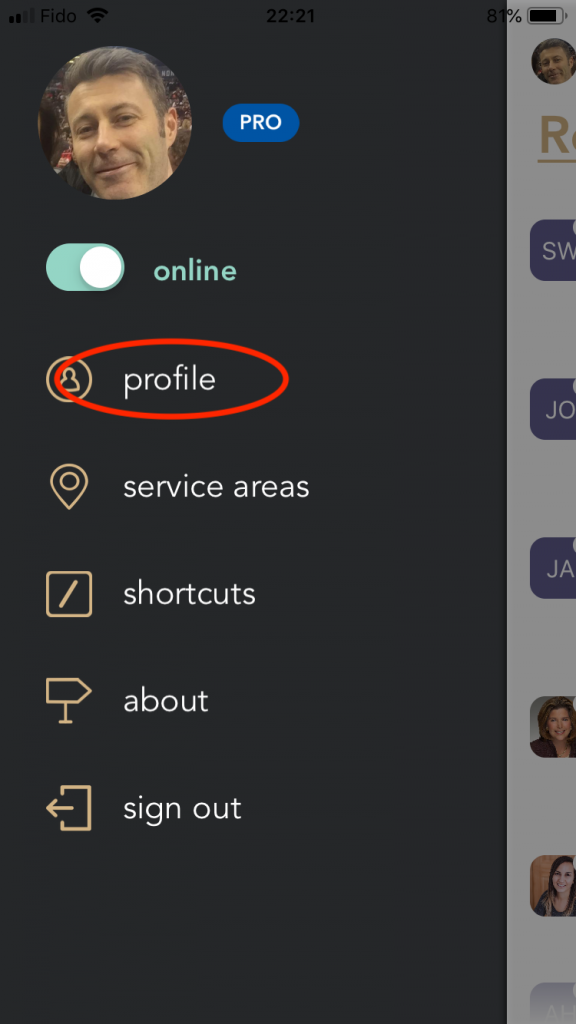
- Again, tap the circular icon – or you can tap on Profile
- Tap ‘Change’ or ‘Take a Photo’ or select a photo from your Photo Library
- Select the photo you would like to use
- Click ‘Save’ in the top right corner
That’s it! Your profile picture will now be displayed in the chat button and chat widget on all of your listing pages.
Tap the circular icon in the top-left corner (this will be blank if you have never uploaded a photo before).
Again, tap the circular icon – or you can tap on Profile.
Tap ‘Change’ or ‘Take a Photo’ or select a photo from your Photo Library.
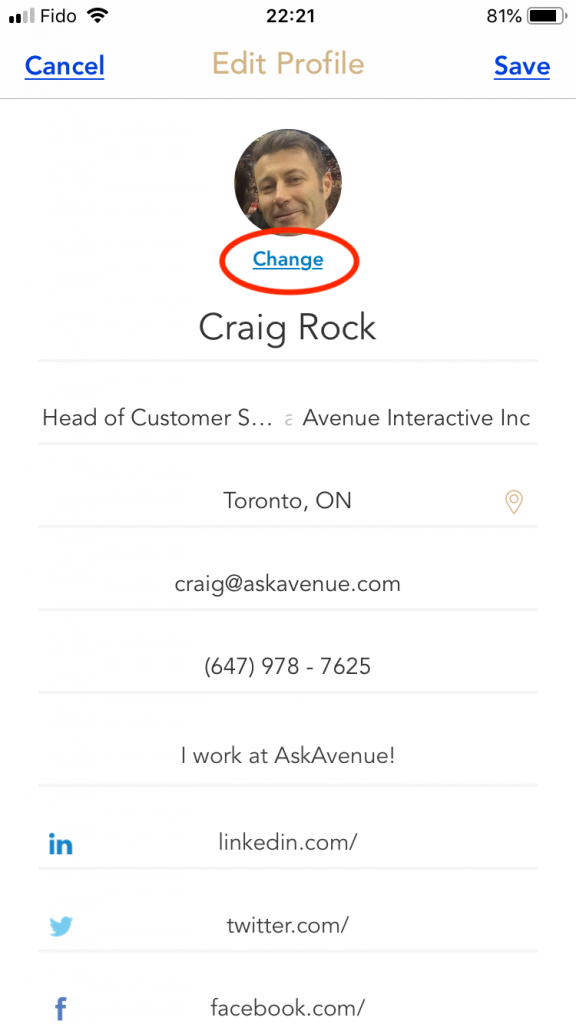
Select the photo you would like to use.
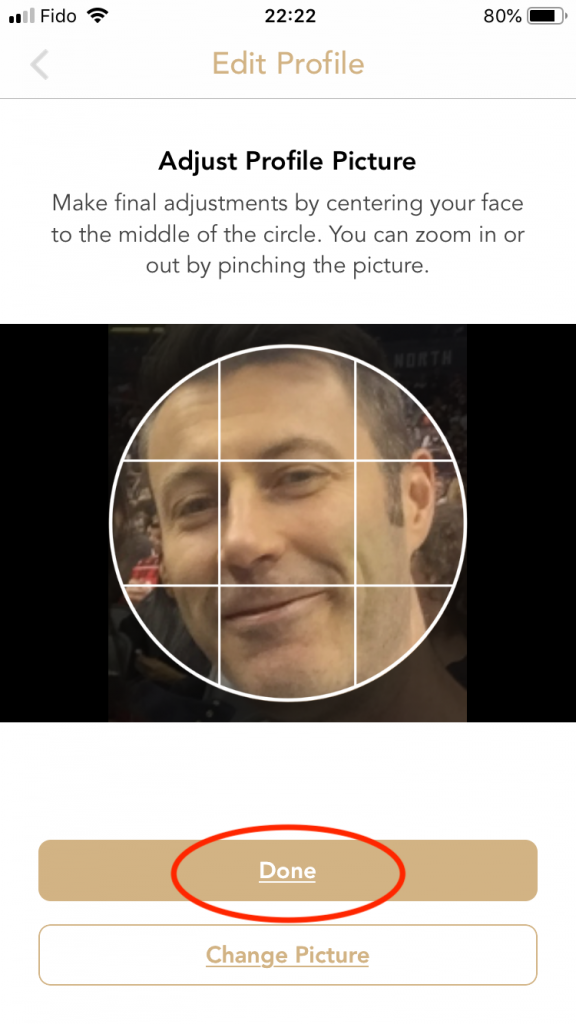
Click ‘Save’ in the top right corner.
That’s it! Your profile picture will now be displayed in the chat button and chat widget on all of your listing pages.
Click below to watch a video on how to upload/update your profile photo.
Customizing The Chat Widget
Just like any great brand experience, personalization goes a long way. You can personalize the chat experience even before chatting with your visitors by using a personal image as the chat button.
Our studies show that a real human face receives the highest amount of clicks and engagement, so smile and take a selfie!

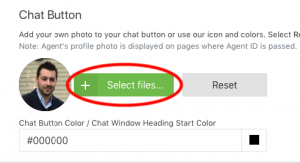
To customize the chat button, you must be logged in to your dashboard.
Once logged in, click Settings > Widget > Appearance on the left-hand navigation bar.

From here, you’ll have the option to replace the default chat button image with your own 😬
Customizing The Chat Widget
To customize your chat widget colour scheme to match the look and feel of your website, you don’t have to go far. Under the Widget > Appearance tab, you can find the Widget Gradient Colour options.
Simply choose your preferred colour shade by clicking the coloured squares, or enter your website’s colour codes for the perfect match!

Click below to watch a video on how customize your chat widget.
Targeting Website Visitors With Proactive Chat
One of the most effective ways to engage your online visitors is by setting up triggers to initiate a proactive chat with a customer based on specified conditions that you define. Your customer can choose whether or not to respond.
With askavenue, you customize the proactive chat trigger timing and greeting message your visitors will see.
Customize The Proactive Chat Trigger
By default, the proactive pop-up is set to appear at 10 seconds.
To customize your proactive chat trigger timer, access chat ‘Trigger’ settings under the Settings tab within your dashboard. From here, you can select a number of pre-set timers based on your liking.
Pro Tip: set proactive chat trigger timing based on your average user time on-site which can be determined with any website analytics tracking software.

Customize The Proactive Chat Greeting Message
Under the same section as the proactive chat trigger setting, you can personalize the proactive greeting that will display for your visitors when prompted to chat.
We recommend using a highly relevant greeting message that is both concise and personal.

Enabling Mobile Notifications
Mobile Notifications
To receive notifications for askavenue on your mobile device, please ensure mobile notifications are turned “ON”.
For iPhone
To enable push notifications on iPhone, please follow these steps:
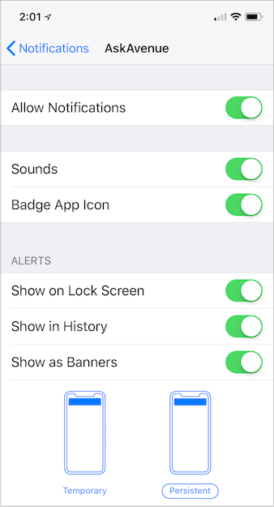
- On your iPhone, open up the Settings App, then tap Notifications
- Locate and tap the askavenue app
- Enable ‘Allow Notifications’ (make sure the selector is Green like in the image below)
- It is also recommended to enable all other notification options for askavenue such as, Sounds, Badge App Icon, and Show on Lock Screen.
For Android
To enable push notifications on your Android phone, follow these steps:
- On your Android device, tap on Settings, then MORE
- Tap on Application Manager, then DOWNLOADED
- Locate and tap on the askavenue app icon
- Make sure there is a checkmark next to ‘Show Notifications’
*Note that notification settings may vary slightly from Samsung, LG and Google Pixel devices.
