Offline Messages
Missed Chats
As a busy agent, you’ll occasionally miss some chats, but that’s alright since askavenue has some great offline/away features that keep consumers engaged and encouraged to chat with you when you do become available.
If you are ever unavailable to chat, simply ignore the chat notification request and someone else from your team will pick it up.
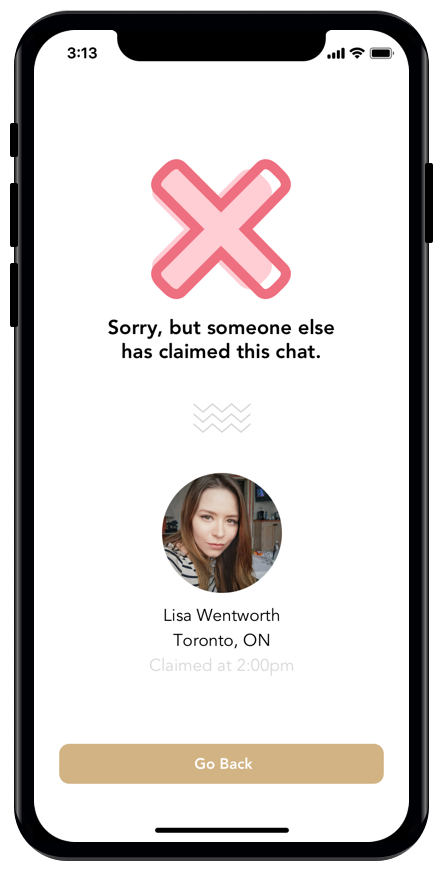
By tapping on the Missed Chats in your inbox, you’ll be able to see which agent from your team/office got the chat instead:
If you’re a single agent, or you noticed that you missed a chat and no one else from your team picked it up, you have the option to respond to the consumer’s request even long after they’ve left the chat conversation. Just as you would with any other chat, simply type your message and tap on the Send button, and your message will be sent as an email to the consumer’s inbox.
Messages that are sent as an offline message are clearly indicated by a lighter coloured chat bubble and highlighted text indicating your message was sent as an email:

When the prospect receives your offline message to their inbox, they have the option to start a live chat with you again directly from within the email.
Here’s what a consumer receives by email when you reply to a missed chat/send them an offline message:
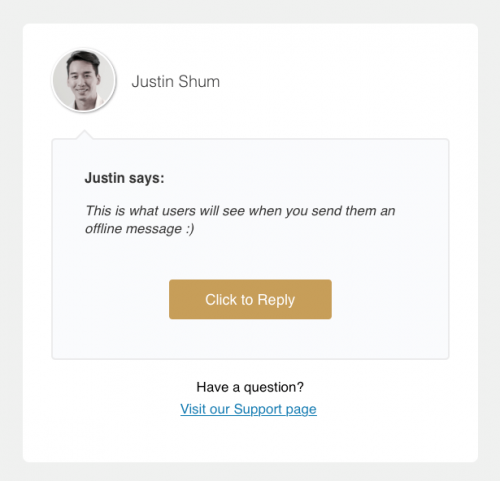
If a consumer clicks the ‘Click to Reply’ button in your offline message, it will take them back to the original webpage they were chatting from and re-open a live chat with you on the other end.
I Forgot My Password – How Can I Reset It?
It can be frustrating at times trying to keep track of all the different passwords we use on a daily basis. Re-setting your login password is simple and should only take you a few seconds. Here’s how;
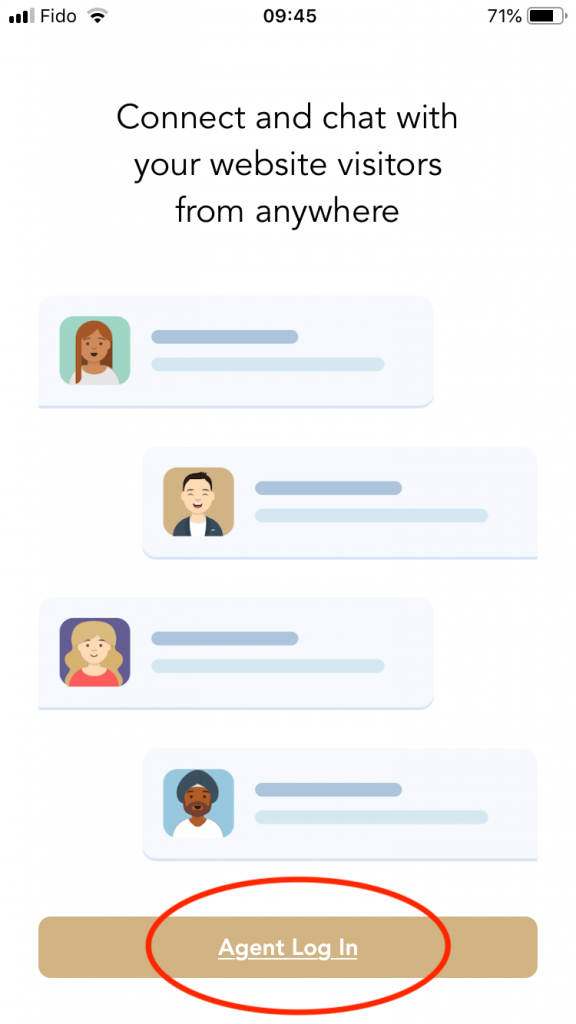
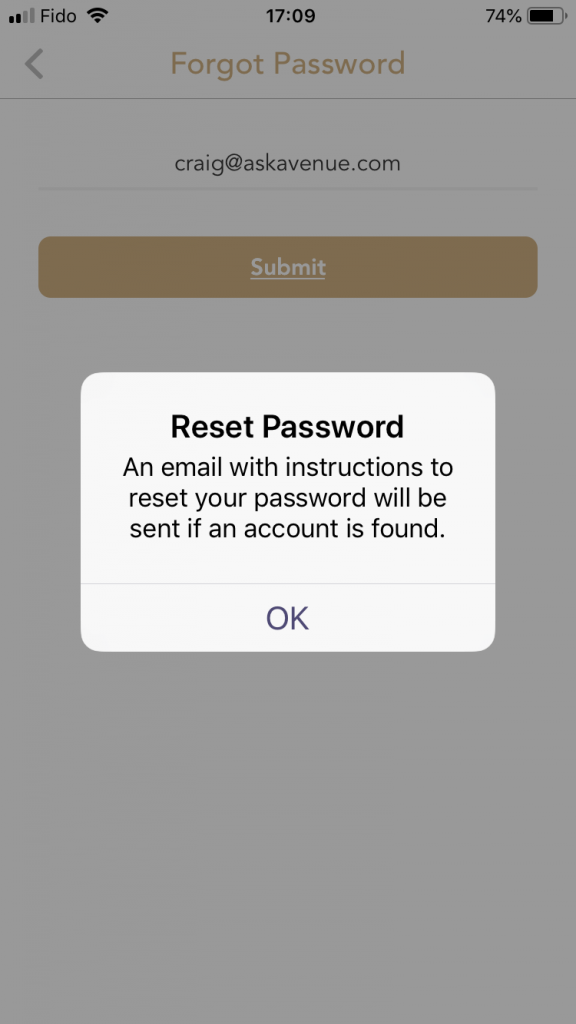
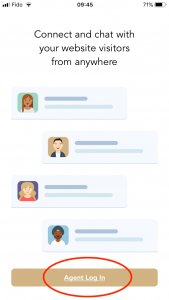
Open the app and click on Agent Log In
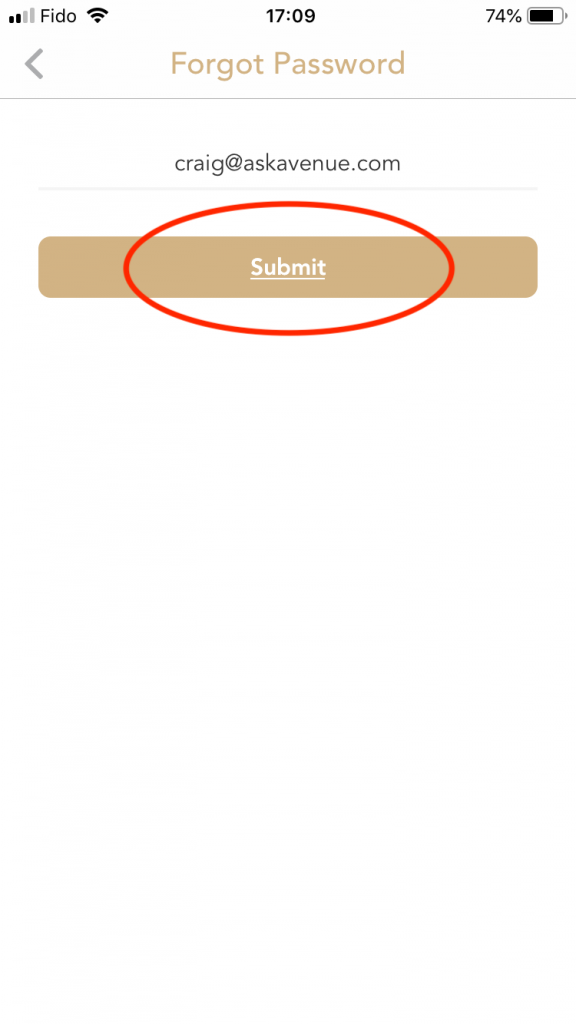
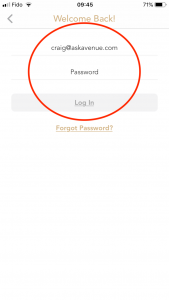
Make sure your email address is filled in and click Forgot Password > Submit and a password reset email will be sent to you
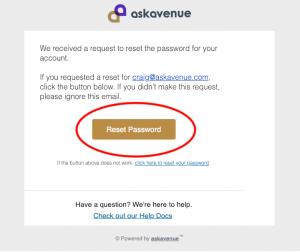
Open the email and click Reset Password
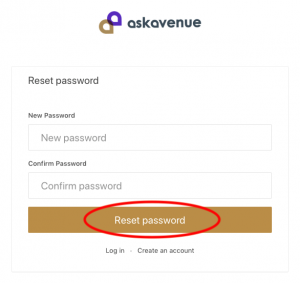
Type in a new password and then confirm the new password again. Click Reset Password to complete
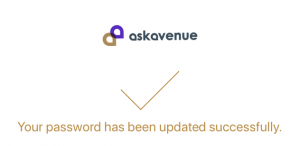
That’s it! Your password has successfully been updated and you can now login to the app using this new password.
*please note, if you think you may know your password but aren’t sure, you can try and enter it as many times as you like, there is no limit on the number of attempts.
Click below to watch a video on how to reset your password.
How To Fix Synchronizing Issues
Some users have reported experiencing a synchronizing issue with the app. Symptoms include the app freezing, unable to respond to a chat, a blurry screen or receiving a constant sync message. This is due to an issue upgrading from Version 1 of the app to Version 2 and the database not syncing correctly for some users. The issue has been fixed but it does require a manual logout and login.
To do this, please ensure you have the most updated version of the app downloaded and take to following steps;
Open the app on your mobile device and tap on your profile photo in the top-left corner.
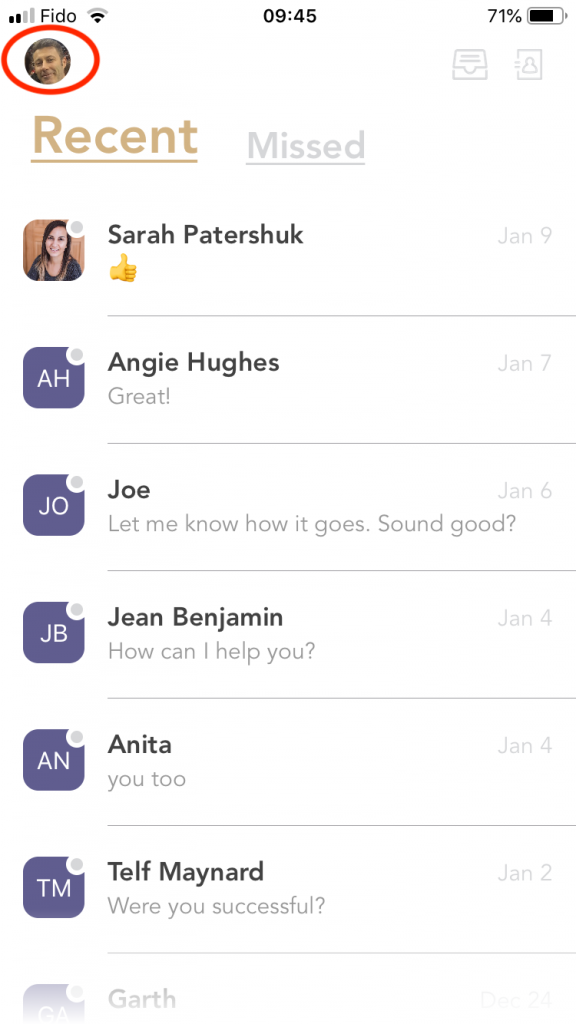
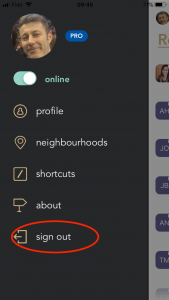
Sign Out of the app and back in. To sign out, open the app and tap on the circular icon in the top left corner, then tap on Profile and scroll down and tap on Sign Out (depending on the mobile device you have, you may see Sign Out on the menu page).
Simply log back into the app. This will complete the sync and your app is now fully updated.
How Can I Update My Billing Information?
Updating your billing information is easily done through your admin dashboard. Please follow these steps;
Login to your admin dashboard at https://dashboard.askavenue.com (we recommend you bookmark this page for easy access in the future).
Alternatively, you can visit www.askavenue.com and click on the LOGIN button at the top.

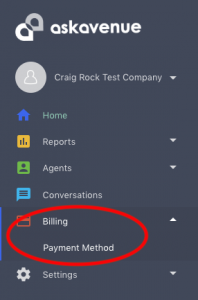
Using the menu on the left, click Billing > Payment Method.
Update your information – be sure to click Save at the bottom of the page once complete.
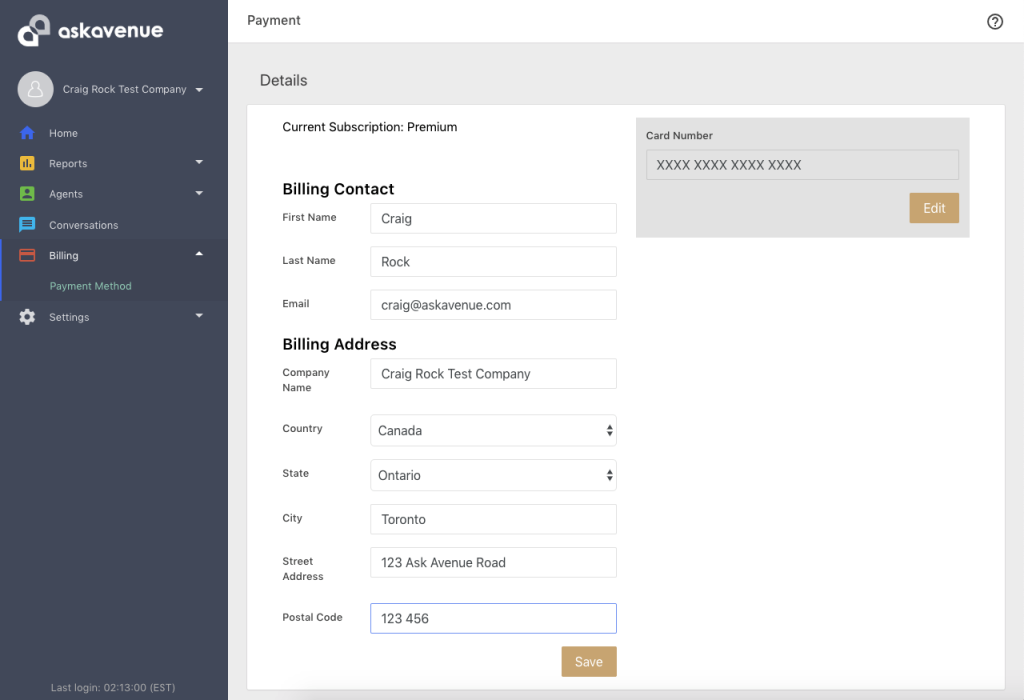
It’s that easy! Your billing information has been successfully updated.
Click below to watch a video on how to update your billing info.
Exporting Leads Into Your CRM
Sometimes it can be difficult managing all of your prospects and chat leads. That’s why askavenue allows to easily import your chat transcripts and contacts into 3rd party CRM’s for easy follow-up and nurturing.
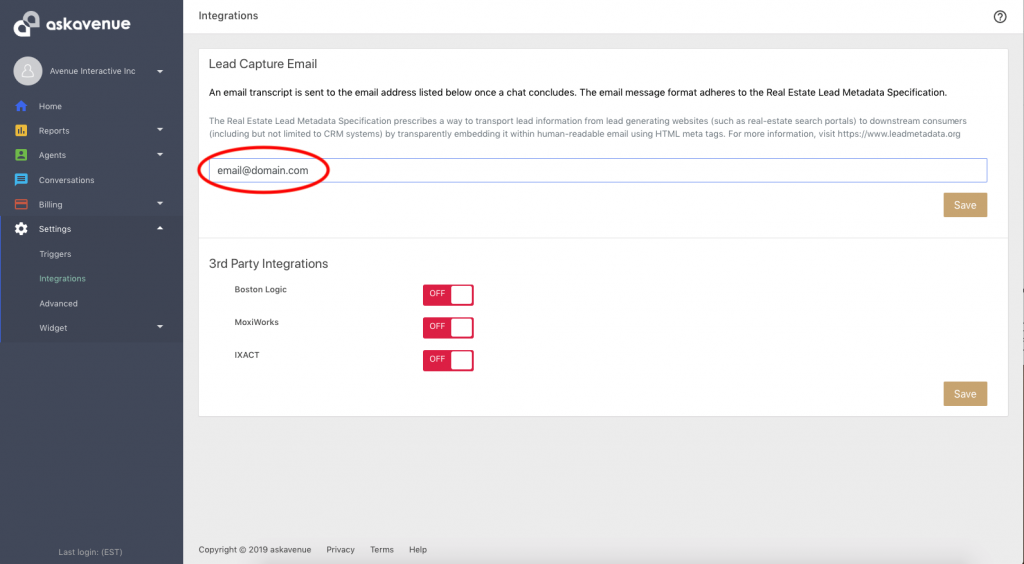
It’s simple to set-up. Just login to your askavenue dashboard and click on Settings > Integrations. Here you will find a Lead Capture Email field – simply type in your unique lead capture email provided by your CRM provider and click Save. That’s it! Your chat transcripts will now automatically be delivered into your favourite CRM.
Click below to watch a video on how to export leads to your CRM.
Enriched Consumer Profiles
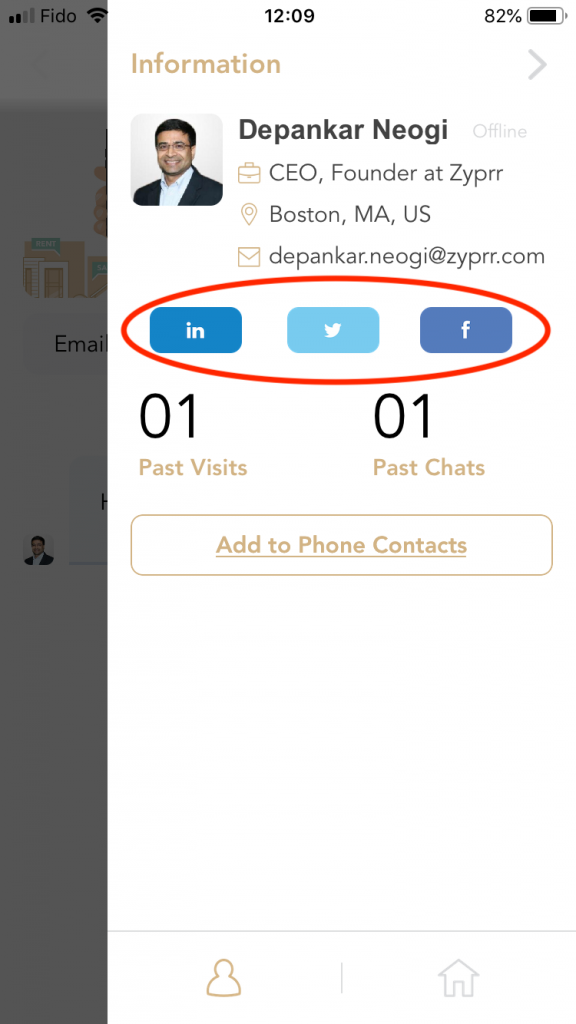
When you have more information about your prospects, it’s easier to prioritize your sales efforts towards the ideal client. Now askavenue allows you to easily gain more consumer insights on the prospects you’re chatting with. From their occupation, specific location to Linkedin, Facebook and Twitter profiles, if your prospect has a presence online, askavenue will find it for you!
You can easily view enhanced consumer information about the person you’re chatting with by opening up a conversation and tapping on the prospect’s initials or photo, located in the top-right corner.
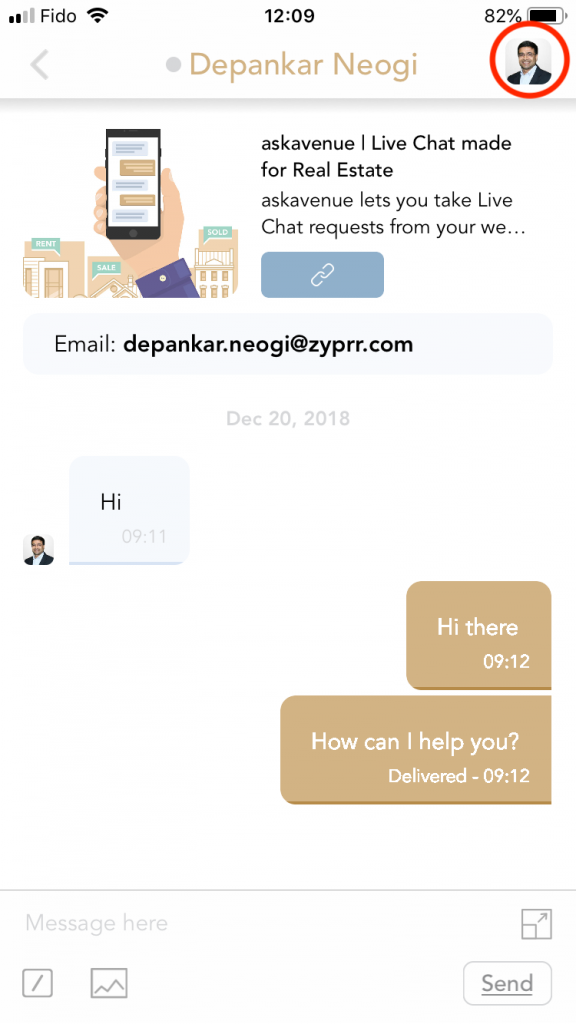
If the prospects email address matches any social media profiles (i.e. Linkedin, Twitter, facebook), they will be displayed and you can tap on the icon to launch a browser on your mobile device to visit the associated profile.
Please note, the askavenue app can only locate specific consumer data if, for example, the prospect’s email is associated with their social media accounts like Linkedin, Facebook or Twitter. Currently, askavenue has a 60% match rate for consumer emails/phone numbers.
Click below to watch a video on how to find more insights on your prospects.
How Do Chatbots Work?
Consumer insights are everything when trying to qualify your prospects. And as an agent chatting with potential customers, it can be tiring asking the same questions over and over. That’s where our chatbots come in and do the work for you!
Once a visitor submits their question, you have the option of allowing our chatbot to kick in and gather important information while the visitor is waiting to connect to you. The best part about it is how easy we’ve made it to enable and set-up chatbots;
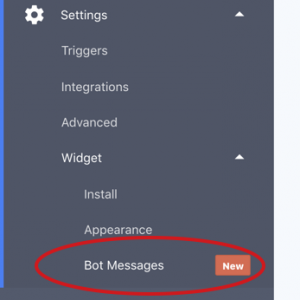
Log into your askavenue dashboard and click on Settings > Widget > Bot Messages.
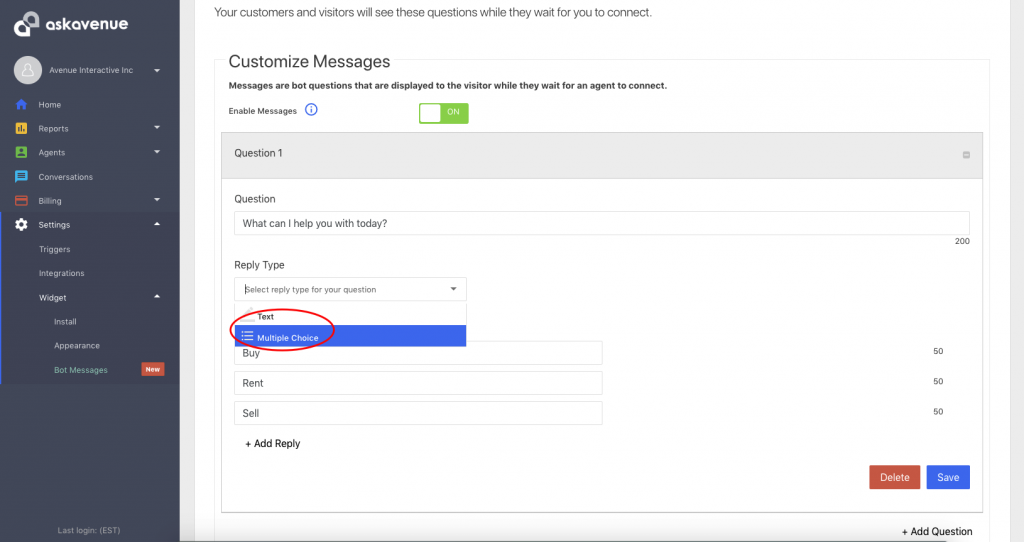
Be sure to select the toggle to ‘ON‘

Once the chat bot is enabled you can easily customize your question and select whether you would like the visitor to type their response or you can provide pre-set multiple choice answers. To allow a unique, typed response, go to Reply Type and select ‘Text’ – to create pre-set multiple choice options, select ‘Multiple Choice’.
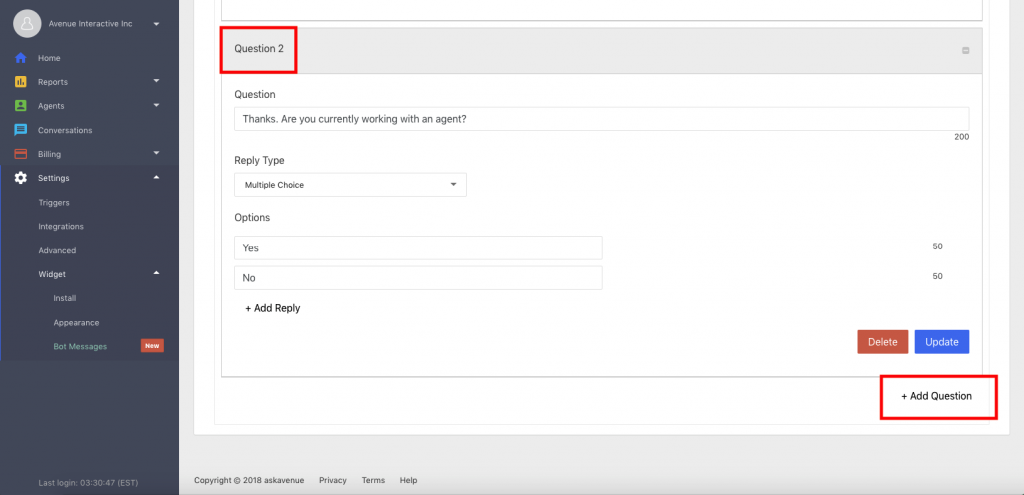
You can add as many chatbot questions as you like, although we recommend only 2-3;
Click below to watch a video on how to setup your Chatbot questions.
How to Add Service Areas
Askavenue is pleased to introduce Service Areas – an easy and efficient way to target hyperlocal leads from your franchise, brokerage, office, and/or team website.
As an agent, you likely specialize and have intimate knowledge of specific areas within the city you work. You can now select specific areas within your city from where you want to receive leads. Tailoring your leads to the specific neighbourhoods you specialize in will help you to maximize your time and focus more on those prospects you can service best.
The new Service Areas feature allows you to select up to 20 localized areas in and around your city.
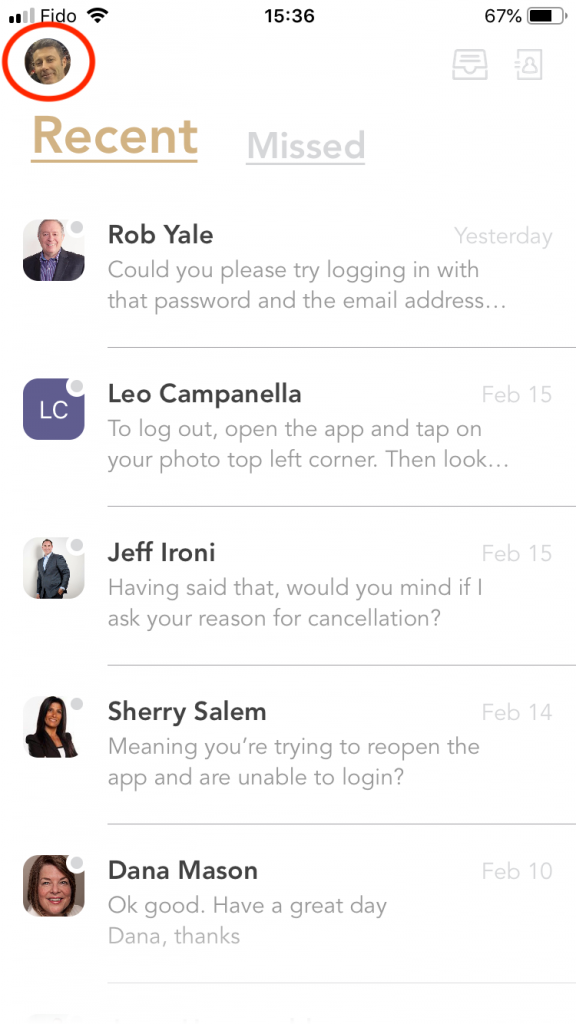
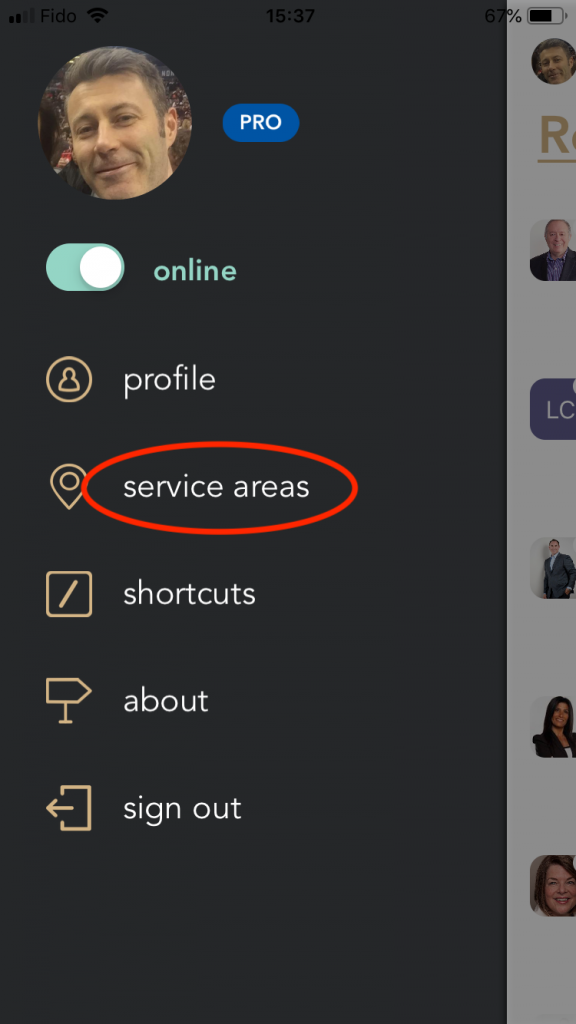
To add Service Areas to your profile, log into the app on your mobile device and tap on your profile picture in the top left corner. Then tap on Service Areas to begin adding your target areas.
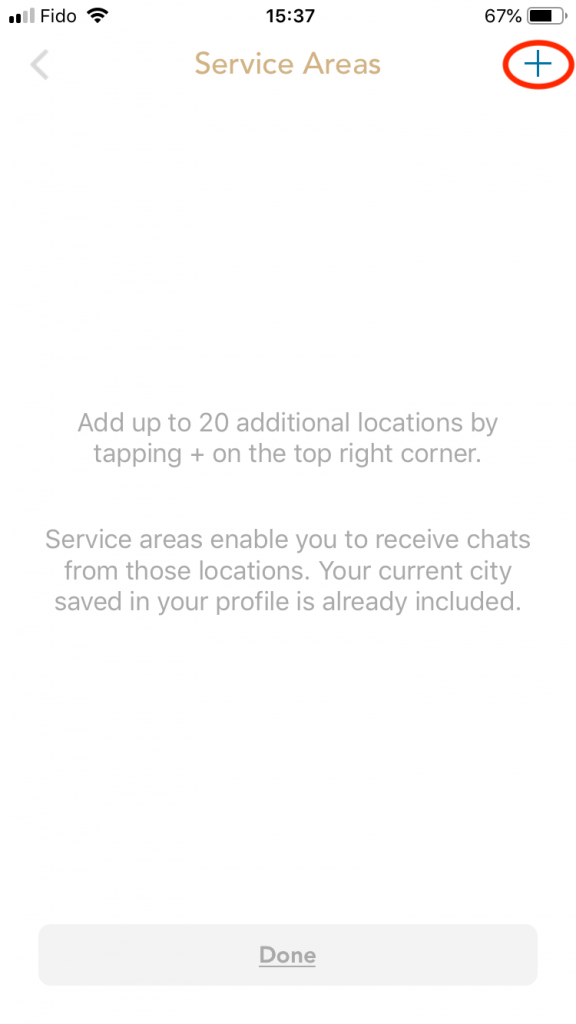
Next, tap the ‘+‘ symbol in the top right corner of the app to begin adding up to 20 service areas. Once you’ve found the service area you are looking for, just tap Add in the top-right corner.
Don’t worry if you’re looking for a specific neighbourhood/area that can’t be found. Available neighbourhoods are dependant upon what is listed within Google Maps. If you can’t find what you’re looking for, try another name or select the areas in and around the neighbourhood you are searching for.
To add Service Areas to your profile, log into the app on your mobile device and tap on your profile picture in the top left corner.
Then tap on Service Areas to begin adding your target areas.
Next, tap the ‘+‘ symbol in the top right corner of the app to begin adding up to 20 service areas.
Once you’ve found the service area you are looking for, just tap Add in the top-right corner.
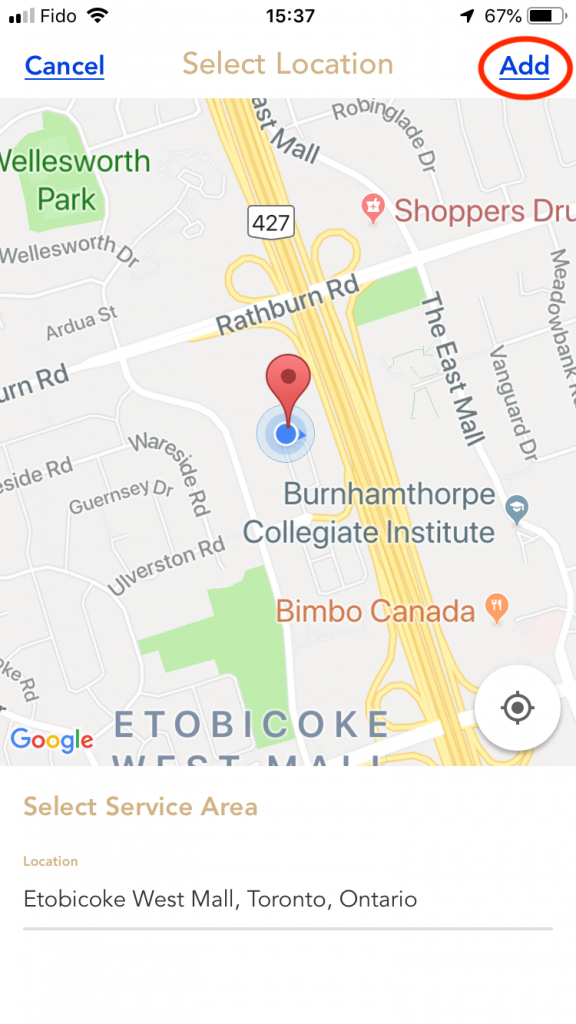
Don’t worry if you’re looking for a specific neighbourhood/area that can’t be found. Available neighbourhoods are dependant upon what is listed within Google Maps. If you can’t find what you’re looking for, try another name or select the areas in and around the neighbourhood you are searching for.
Click below to watch a video on how to add service area to your profile.